Photographer David Hobby has a blog called Strobist. He just posted “How we got here: Analog Photoshop,” a post on “pre-flashing” in the darkroom. That inspired this post on “Unsharp Masking” before Photoshop.
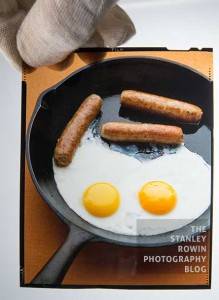
When I was starting out as a photographer, I was building a portfolio. Being a starving artist, my first portfolio was built with things I had handy. Below is one of my first food photos. It was shot on 4×5″ transparency film.
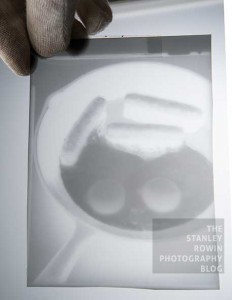
I wanted to make an enargement of it on Cibachrome photo paper, which made prints from slides and transparencies, as opposed to negatives. The problem was that there was too much contrast between the shadow areas in the pan and the whites of the eggs for the Ciba paper. So we had to make a mask to help compensate for the extended latitude of the chrome. The mask was made on low contrast black-and-white negative film, and was slightly out of focus, so it was called an “un-sharp mask.” Below is a photo of the unsharp mask used for the photo above:
It allowed contrast control in the enlarger without affecting the edges in the photo. Now the unsharp mask control is used in Photoshop to make a photo appear sharper by increasing the contrast in the edges of a photo.
Extra credit reading is at Wikipedia.